The Alluring but Deceptive Promise of Epoxy Floors
An epoxy garage floor coating creates a beautiful, seamless, and glossy surface that can completely change the look of any garage. However, achieving that showroom finish is deceptively difficult. This isn’t a simple weekend painting project; this is an advanced chemical application that demands professional precision.
A professional installer arrives with industrial-grade diamond grinders, precise moisture meters, and years of experience working with two-part, 100%-solids epoxy. They know how to get the job done right because they’ve seen what happens when it goes wrong.
If you get a DIY epoxy installation wrong, you’re facing a nightmare. Common failures include hot-tire pickup, peeling, bubbles, delamination, and trapped moisture that can lead to mold. You might even see chunks of epoxy lifting right off the concrete slab.
These are all well-documented risks of an improper installation. I wouldn’t mind having an epoxy-coated floor, but only if it were installed by a seasoned pro. I know just how hard it is to get it right.
For a DIY project, I’d much rather cover the floor in durable PVC tile to protect the concrete from salt, water, chemicals, and oils. Other easier and more forgiving choices include painting the floor, tiling it with interlocking tiles, or covering it with simple containment mats. You can find more details in our articles on the pros and cons of epoxy and the best epoxy products if you’re still considering it.
The Gauntlet of Prep Work: Why DIY Epoxy Fails
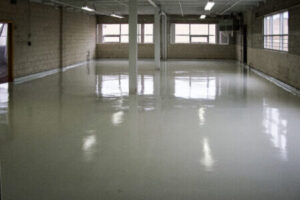
Epoxy makes many demands on your concrete slab. Is it fully cured? Is it completely clean and free of oils? Has any old paint, coating, or polish been removed? Is the surface porous enough for the epoxy to bond?
To adhere properly and deliver that signature shine, epoxy needs a perfectly clean, dry, porous, and defect-free surface. Unfortunately, concrete is naturally porous, often damp, and tends to crack, spall, and pit over time. Every single one of these issues is a roadblock for a successful epoxy job.
The preparation process can take days of intensive labor just to get the floor ready for a primer coat. First, the concrete must be at least 30-60 days old to fully cure. Then, you must clean it meticulously to remove all oils, grease, and dirt.
Next, you have to “unpolish” the concrete by grinding or acid etching to create a rough profile for the epoxy to grip. If the floor was ever sealed, that sealant must be completely removed. Finally, every crack, pit, and spall must be repaired to create a smooth, monolithic surface. If you get any of these stages wrong, the epoxy will fail.
If your floor has pitting, spalling, or cracking, you must address it. We have a complete library of articles to guide you, from fixing your garage floor to repairing cracks and fixing spalling for a perfect finish.
The Critical Primer Coat That Makes or Breaks the Bond
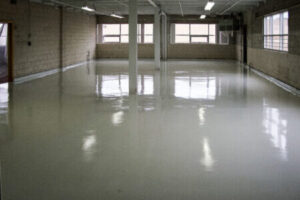
After the exhaustive preparation is complete, the next step is applying a pre-epoxy primer. This base coat is absolutely crucial because it seals the porous concrete surface. This prevents the slab from drinking up the more expensive epoxy topcoat, ensuring you get even coverage.
More importantly, the primer creates a tenacious bond between the raw concrete and the epoxy coating. Skipping this step or applying it incorrectly is a guaranteed recipe for delamination and peeling down the road.
Always defer to your product’s specific instructions, but the process generally involves wetting the concrete surface if required by the primer. You then spread the primer in a smooth, even layer and wait for it to dry completely. For best results, a second layer is often recommended, which means more drying time.
This stage alone highlights the unforgiving nature of epoxy. Every layer must be perfect before you can even think about applying the epoxy topcoat.
The Final Countdown: Applying Epoxy Before It’s Too Late
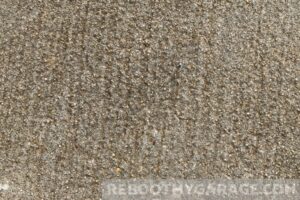
Now, we finally arrive at the epoxy stage itself. This is where the pressure truly mounts. You need to wait for the perfect weather conditions—not too hot, not too cold, and with low humidity, ideally between 60-85°F.
Once you mix the two parts of the epoxy (the resin and the hardener), a chemical reaction begins, and the clock starts ticking. You have a limited “pot life,” often less than an hour, to get the entire mixture down before it starts to cure in the bucket, becoming a useless, solid block.
You have to hurry up and get the epoxy down in a smooth, even layer, being careful not to get it on anything but the floor. An anti-slip additive should be mixed in for safety. After the main coat is down, you must wait for it to cure (typically 12-24 hours) before adding a finisher.
A clear urethane topcoat is highly recommended for UV and scratch protection. This means waiting for the first finisher coat to dry, then adding a second for maximum durability. There are so many places for this to go wrong.
I absolutely would hire a professional to do an epoxy job in my garage. I would not do it myself. Epoxying is not a job for amateurs.
Why Interlocking Tiles are the DIY Champion
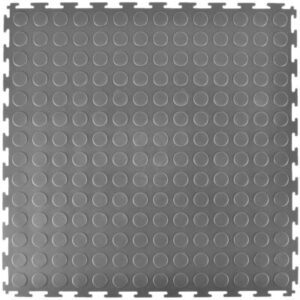
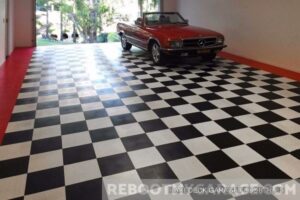
Plastic interlocking tile is my top recommendation for a DIY garage floor upgrade. It looks incredible, requires minimal preparation, and is remarkably simple to install. Both PVC and polypropylene tiles offer a professional finish that protects the concrete from damage and looks fantastic.
Unlike epoxy, there is no harsh chemical smell, no race against the clock, and no need for industrial grinding equipment. The tiles simply snap together, creating a durable and resilient “floating floor” over your existing concrete.
They protect the concrete floor from moisture, road salt, dirt, oil, and grease. Because they come in a huge variety of colors and patterns, you can have a beautiful, custom floor without the extreme hassle and risk of epoxy or paint.
You can create amazing designs with awesome colors that make your garage look like a NASCAR pit stop. The tiles themselves often feature raised patterns like coin or diamond shapes, which enhance traction and add visual appeal.
Which Tile Is Right for You: PVC vs. Polypropylene?

There are two main kinds of interlocking garage floor tile: flexible PVC and rigid polypropylene. Both look amazing, install the same way, and are incredibly durable, long-lasting options, but they have distinct feels.
Polypropylene (poly) is a very dense, tough, and rigid plastic. Because it is harder, it tends to make more noise when you walk on it. The tiles are usually hollow underneath, creating a “floating floor” that allows air and moisture to circulate, which can be great for slightly damp floors.
PVC (polyvinyl chloride) is a type of flexible plastic. These solid tiles have more give, making them significantly quieter to walk on and more comfortable underfoot. PVC tends to grip dirt and chemicals a bit more than poly, but both are very easy to clean.
The choice often comes down to personal preference for acoustics and feel. Polypropylene provides a louder, more “clacky” sound when walked on, which some people like, while PVC is much quieter and softer.
How Much Do Garage Floor Tiles Cost?

When considering a garage floor upgrade, cost is a major factor. Interlocking tiles offer a premium look at a manageable price, especially when you factor in the savings of a DIY installation versus hiring a professional for epoxy.
Polypropylene garage tiles are the more budget-friendly option, typically costing about $2 to $3 per square foot. They provide that classic, rigid race-inspired look without breaking the bank.
Flexible PVC interlocking tile is a more premium product and generally costs between $4.50 and $7.50 per square foot. The higher cost reflects its quieter performance and more substantial, solid construction.
As an example, a standard two-car garage of 400 square feet would cost roughly $800 to $1,200 for polypropylene tiles. The same garage would cost between $1,800 and $3,000 for PVC tiles. Keep in mind that materials prices can fluctuate, so always check current pricing.
Built to Last: How Garage Tiles Handle Real-World Abuse
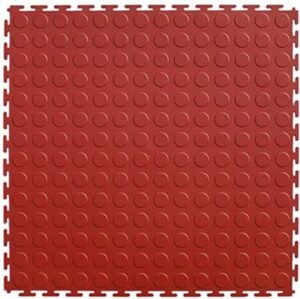
Both PVC and polypropylene tiles are built to withstand the harsh environment of a garage. PVC has an enormous load capacity, with weight ratings often exceeding 80,000 lbs. High-quality poly tiles are similarly tough, holding upwards of 3,000 lbs per tile for an 80,000 lb overall installation rating.
If you drop a heavy tool or weight on either surface, they will hold up remarkably well. However, they do handle impacts and concentrated loads differently. If you drop something heavy on a flexible PVC tile, it might show a temporary dimple that eventually “heals” itself due to the material’s resilience.
The biggest difference comes from concentrated weight, like that from a loaded floor jack or a motorcycle kickstand. Flexible PVC holds up better to these point loads because it has give and can recover its shape. Rigid poly tiles will either stand up to the weight or get a permanent dimple that doesn’t heal.
A hot spinning tire is also more likely to leave a mark on PVC than on polypropylene. This is an extreme situation, but it is a concern for some users.
From Bare Concrete to Showroom Floor: A Step-by-Step Tile Guide
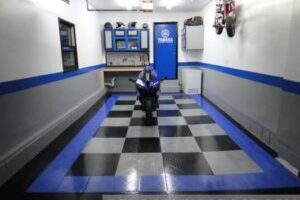
Prepping for a tile installation is a breeze compared to epoxy. Simply sweep or vacuum up any loose dirt, dust, and debris. It is perfectly fine to install tiles over small cracks or a floor with a slight grade. Wait for the floor to be completely dry before you begin.
If your garage has known moisture issues, it’s wise to address them first. A simple test is to tape a 2’x2′ plastic sheet to the floor for 24 hours. If condensation forms underneath, you may want to apply a concrete sealer before laying solid PVC tiles to prevent mold growth.
For the best visual result, start the installation in the center of the room. This ensures you have full, uncut tiles in the main, most visible area. Work your way out toward the walls, leaving the partial, cut tiles along the less noticeable edges.
Use your utility knife and straightedge to trim the tiles to fit along the walls. Remember to leave a small expansion gap (about 1/4 to 1/2 inch) between the edge of the tiles and the walls to allow for natural expansion and contraction with temperature changes.
Easy Cleaning and Long-Term Peace of Mind
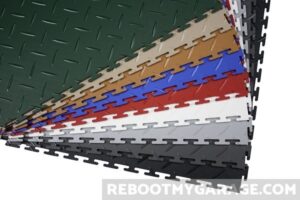
Maintaining a plastic tile floor is incredibly easy. For routine cleaning, just sweep or vacuum away loose debris. When needed, you can use a mop with warm, soapy water and a mild detergent. You can also spot treat any scuffs with a polish like Armstrong Shinekeeper.
Most common garage messes are no match for these tiles. Street tar and oil stains will typically come up with a quality degreaser like Purple Power or Oil Eater.
Perhaps the best feature is the ease of repair. If a hot tire leaves a mark or a tile somehow gets permanently damaged, the fix is simple. You just pop out the single damaged tile and snap a new one in its place, a repair that takes seconds.
Finally, these tiles offer incredible peace of mind through long warranties. PVC floor tile warranties are typically 10 to 25 years long, while polypropylene tiles carry 10 to 20-year warranties. These long guarantees, like the ones offered by RaceDeck, are a testament to just how strong and durable these products are, making them a wise and worry-free investment for your garage.
Forgiving Alternatives: Smarter DIY Garage Floor Upgrades

I want a garage floor covering that looks fantastic, protects my concrete, and doesn’t require a week of back-breaking, high-stakes preparation. My options are far more user-friendly than epoxy.
My top choices for a DIY project include PVC tile, polypropylene tile, and various types of floor mats. I’m definitely not painting my garage floor. Most floor paints are just “epoxy-light,” single-part epoxies or acrylics that require similar prep but offer far less durability. Paint will eventually peel, and I don’t want to scrape flakes of it off my concrete.
Plastic interlocking tile, on the other hand, is amazing to look at, easy to install, and incredibly simple to maintain. It protects the floor from damage and makes the garage look like a professional showroom.
For the simplest solution, putting down some high-quality floor mats is the least I can do. Containment mats are brilliant for snowy climates, as they have a raised edge to hold the snow, ice, and road salt that melts off your car and eats away at concrete floors. Preparation is as simple as sweeping the floor clean.
Your Simple Toolkit for a Weekend Tile Installation
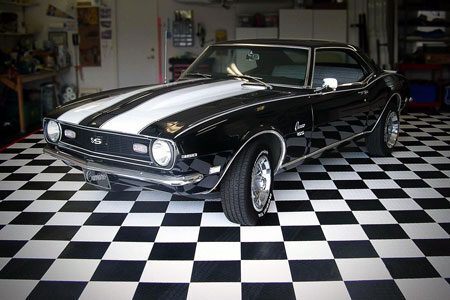
One of the biggest selling points for interlocking tiles is the incredibly simple installation process. Manufacturers often say you can install their tiles without tools, and they’re mostly right. You won’t need any power tools!
Most people use a rubber mallet to gently tap the interlocking male-female lugs into place, securing the connection between tiles. If you don’t have a mallet, you can simply step on the seams with the heel of your shoe to lock them together.
The only real tools you will need are a sharp utility knife and a straightedge. These are for cutting the tiles that meet the walls or any other obstructions in your garage. As a general rule, it’s easier to cut the more flexible PVC than the rigid polypropylene.
You might want to have some pressure-sensitive tape on hand for the edges if you experience any unexpected movement, but high-quality tiles tend to lock together firmly and stay put without any adhesive.


