Table of Contents
Clear garage clutter and free up floor space by choosing the right multi bike wall storage solution. This guide helps you compare heavy-duty bars, adjustable hangers and pivoting racks so you can pick a system that fits your bikes, your wall and how often you ride.
You’ll learn which racks save the most space, which handle fat or fendered tires, and what installation trade-offs to expect, so you can reclaim usable garage space and protect your bikes.
How We Picked
You want a rack that actually fits your bikes and your life. We focused on: capacity and spacing (true holding capacity vs practical use), build quality and weight rating, tire compatibility (narrow, wide, fat or fendered), mounting method and ease of installation (stud or masonry required), adjustability and modularity for changing fleets, and value for the money including warranty and customer support.
Real customer feedback about durability, installation quirks and whether 5–8 bike claims are usable in everyday life was weighed heavily — especially for multi bike wall storage where crowding is a frequent issue.
Best 5-Bike Rack
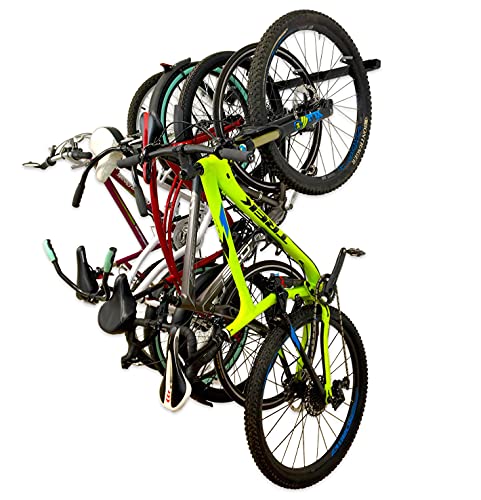
StoreYourBoard 5-Bike Rack
- Stores up to 5 bikes with a total weight capacity of 300 lbs
- Adjustable wall mount design for customizable bike storage
- 45 mounting slots for flexible bike positioning
- Made from heavy-duty steel for durability and strength
- Easy installation using the Infinity Stud System
- Rubber-coated hooks to prevent bike scratches and damage
- Designed to fit various bike sizes and styles
- Compact, space-saving design for garage organization
If you want to clear the garage floor without juggling bikes, this StoreYourBoard 5-bike rack is a solid, no-fuss option for multi bike wall storage. You mount the powder-coated steel bar to studs, slide on the adjustable hangers, and suddenly you’ve got bikes up and out of the way — great for daily commuters, kids’ bikes, or storing extra bikes between weekend trips. It’s especially handy when you need to free up floor space for projects, park gear for guests, or pack the car for a cycling getaway. I’d suggest this if you want something sturdy, flexible, and easy enough to live with day to day.
Ease of Use
|
Feature |
Ease Level |
|---|---|
|
Installation (mounting to studs) |
Moderate |
|
Adjusting hanger positions |
Easy |
|
Daily take-down/put-up of bikes |
Moderate |
|
Ongoing maintenance |
Easy |
Durability
Built from alloy steel with a powder-coated finish, this rack feels solid when secured to studs and is rated to hold up to 300 lb. The hangers use a locking-pin system now, so they stay put; just be mindful of tight spacing when you pack five adult bikes closely together.
Key Benefits
- Stores up to five bikes to free up floor space
- Adjustable hangers let you customize spacing for different frames
- Rubber-coated hooks protect rims and frames
- Made from alloy steel with a powder-coated finish for rust resistance
- Mounts to studs for maximum stability; shelf option available for extra storage
Rating: 4.7 (total: 2,973+)
Best 6-Bike Rack
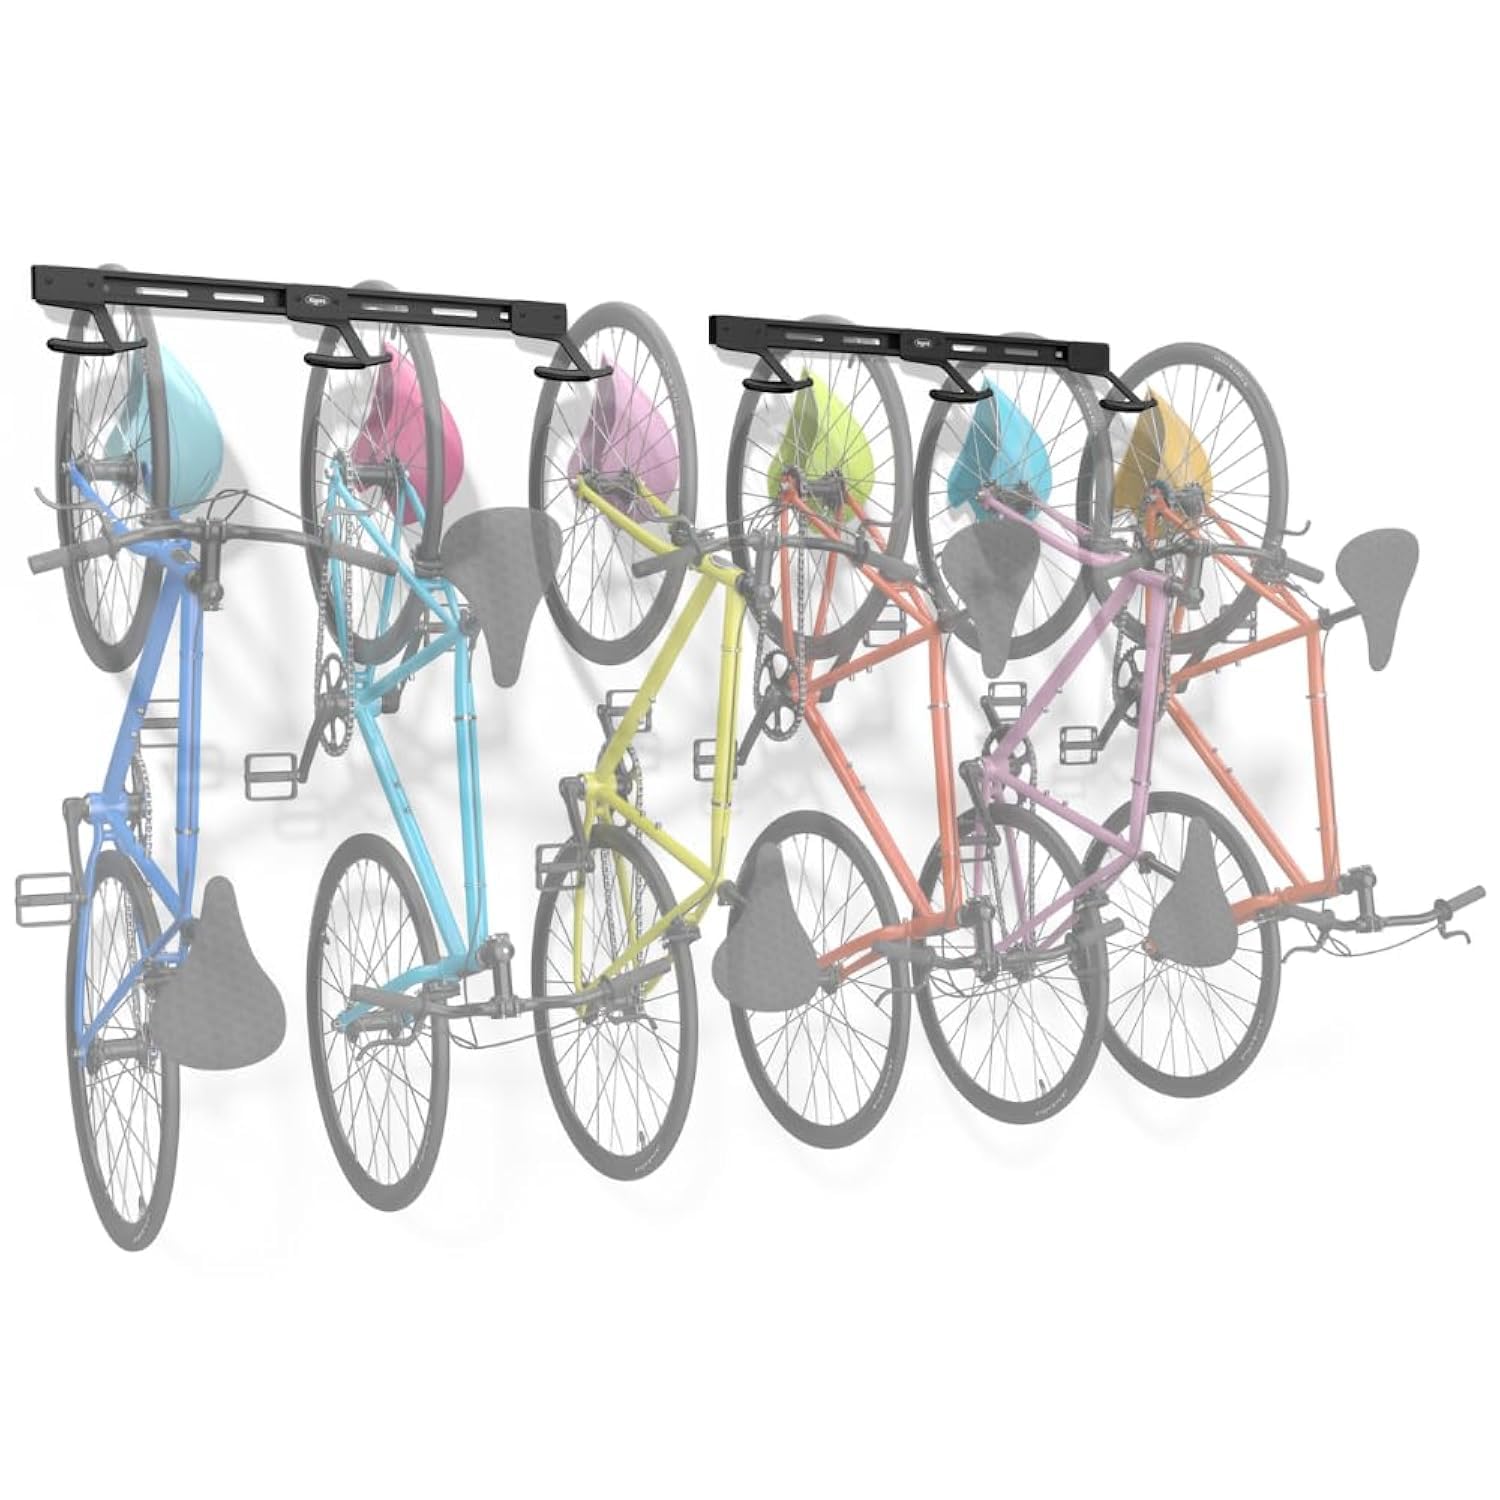
Koova 6-Bike Wall Rack
- Made in the USA with high-quality steel components
- Heavy-duty bike storage for multiple bikes and helmets
- Easy installation with included hardware
- Adjustable hangers to fit various bike types and sizes
- Protects bikes from damage with rubber-encased hooks
- Includes utility shelf for organizing accessories
- Lifetime satisfaction guarantee with repair, replacement, or refund options
If you want a tidy solution for multi bike wall storage, this Koova 6-bike rack is one of the more practical choices you’ll find. You screw the powder-coated steel bar to studs, slide on the adjustable hangers and get bikes off the floor — great for daily commuters, a family’s worth of kids’ bikes, or stashing bikes between weekend trips.
It’s also handy when you need to clear space for a project, park extra bikes for guests, or prep to load gear for a ride. The hooks are rubber-encased so rims stay happy, and Koova will even send larger hooks if you have extra-wide tires, which makes it feel like a setup you can live with every day.
Ease Of Use
|
Feature |
Ease Level |
|---|---|
|
Installation (mounting to studs) |
Moderate |
|
Adjusting hanger positions |
Easy |
|
Daily hang/take-down of bikes |
Moderate |
|
Swapping hooks for fat tires |
Moderate |
Durability
Built from alloy steel with a powder-coated finish and a lifetime warranty on parts, this rack feels solid once anchored to studs. The rubber sleeves protect finishes, and the company’s responsive support (including optional larger hooks) adds practical longevity.
Key Benefits
- Clears floor space by storing up to six bikes on the wall
- Adjustable hangers let you space bikes to fit different frames
- Rubber-encased hooks protect rims, spokes and tires
- Made in the USA with powder-coated alloy steel and a lifetime warranty
- Includes helmet hooks and optional jumbo hooks for fat tires
Rating: 4.7 (total: 2,353+)
Best 8-Bike Rack
StoreYourBoard BLAT 8-Bike Rack
- Made of solid steel for heavy-duty bike storage
- Holds up to 8 bikes, with a maximum weight capacity of 400lbs
- Rubber-coated hooks protect bike wheels from scratches
- Fits most bikes under 50lbs with rims under 2" wide
- Includes heavy-duty wall mounting hardware for secure installation
- Designed to fit standard 16" wall stud spacing
- Durable powder coating helps prevent rust
- Arrives fully assembled for easy installation
If bikes are taking over your garage floor, this BLAT 8-bike rack makes multi bike wall storage feel effortless. You screw the long steel bar to studs, hang the rubber-coated hooks and suddenly there’s walking space again.
It’s great for daily commuting bikes, a household with several kids’ or adult bikes, or when you need to clear the floor to work on a project or park a car for company. The hooks grip rims gently so you won’t be worrying about scratches, and once it’s mounted it’s the kind of setup you’ll forget about until you need a clear garage.
Ease Of Use
|
Feature |
Ease Level |
|---|---|
|
Installation (mounting to studs) |
Moderate |
|
Daily hang/take-down of bikes |
Easy |
|
Spacing for larger frames or handlebars |
Moderate |
|
Mounting to masonry or brick |
Moderate |
Durability
Powder-coated alloy steel and rubber sleeves make this rack tough and low-maintenance. It’s designed to be solid once anchored to studs and reviewers report it holds up well under regular use.
Key Benefits
- Clears floor space by holding up to eight bikes on the wall
- Heavy-duty alloy-steel construction for reliable support
- Rubber-coated hooks protect rims and reduce scratches
- Arrives assembled with mounting hardware for studs
- Works with most road, mountain and kids’ bikes (not recommended for e-bikes)
Rating: 4.6 (total: 607+)
Best 2-Bike Rack
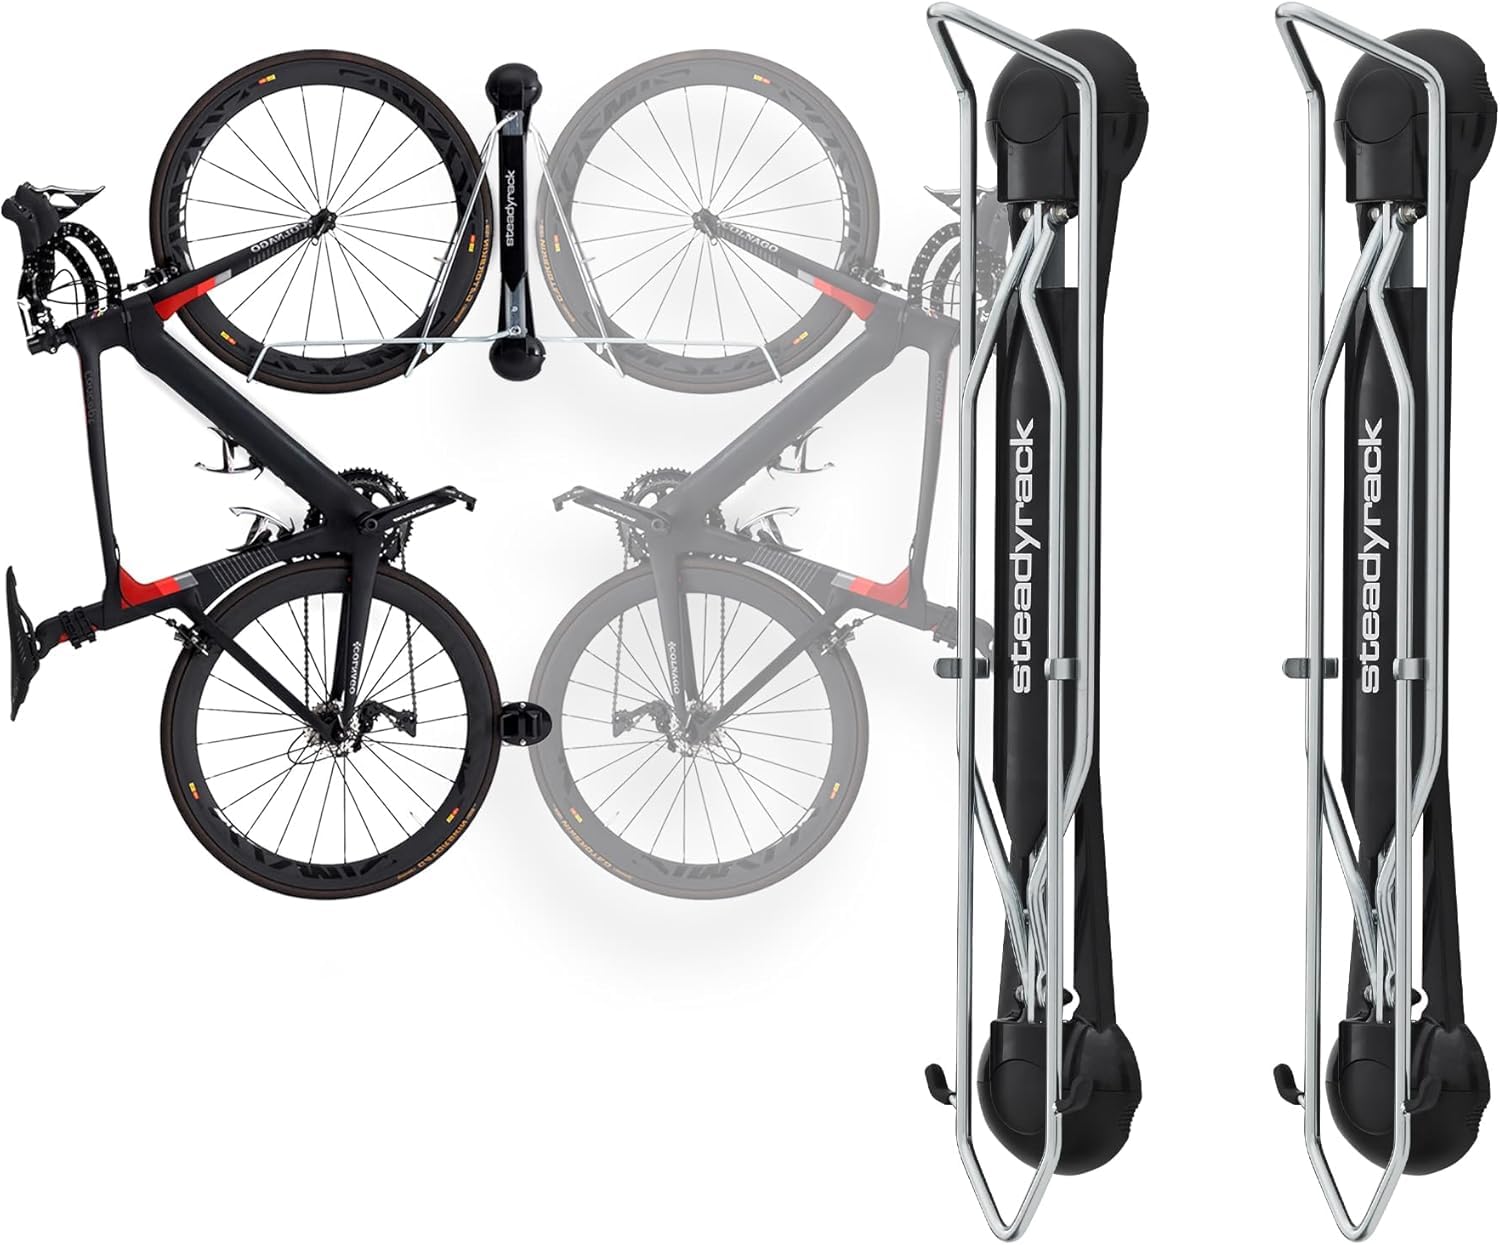
Steadyrack Classic 2-Pack
When you want the floor back, this Steadyrack classic does the heavy lifting for you. The roll-in, pivoting design means you don’t hoist your bike — you just balance the rear wheel and roll it into the cradle, then swivel it out of the way.
It’s great for multi bike wall storage in a garage, shed, or apartment: daily commuter bikes, a family collection of different-sized wheels, or when you need to clear space for a car, project, or visiting guests. Mounting is intended for studs or masonry (follow the instructions — mounting to plasterboard alone voids the warranty), and once it’s in place you’ll appreciate how smoothly bikes go on and off. Best for road, hybrid and commuter bikes with tires up to 2.1″ and wheels 20″–29″.
Ease Of Use
|
Feature |
Ease Level |
|---|---|
|
Installation (mounting to studs) |
Moderate |
|
Daily hang/take-down of bikes |
Easy |
|
Using the pivot to save space |
Easy |
|
Mounting to masonry or brick |
Moderate |
Durability
Made from carbon steel with ABS components and a chrome finish, the Classic rack feels solid and built to last. Rated to hold about 35 kilograms per rack and backed by a manufacturer warranty, reviewers report years of reliable use with minimal maintenance.
Key Benefits
- Roll-in, roll-out system makes hanging bikes quick and low-effort
- Pivoting rack folds to the side to reclaim floor space
- Built from carbon steel and ABS plastic for long-term reliability
- Fits most road and hybrid bikes (wheels 20″–29″, tires up to 2.1″)
- Includes installation kit for studs or masonry and holds up to 35 kilograms
Rating: 4.8 (total: 3,169+)
Best Fat Tire
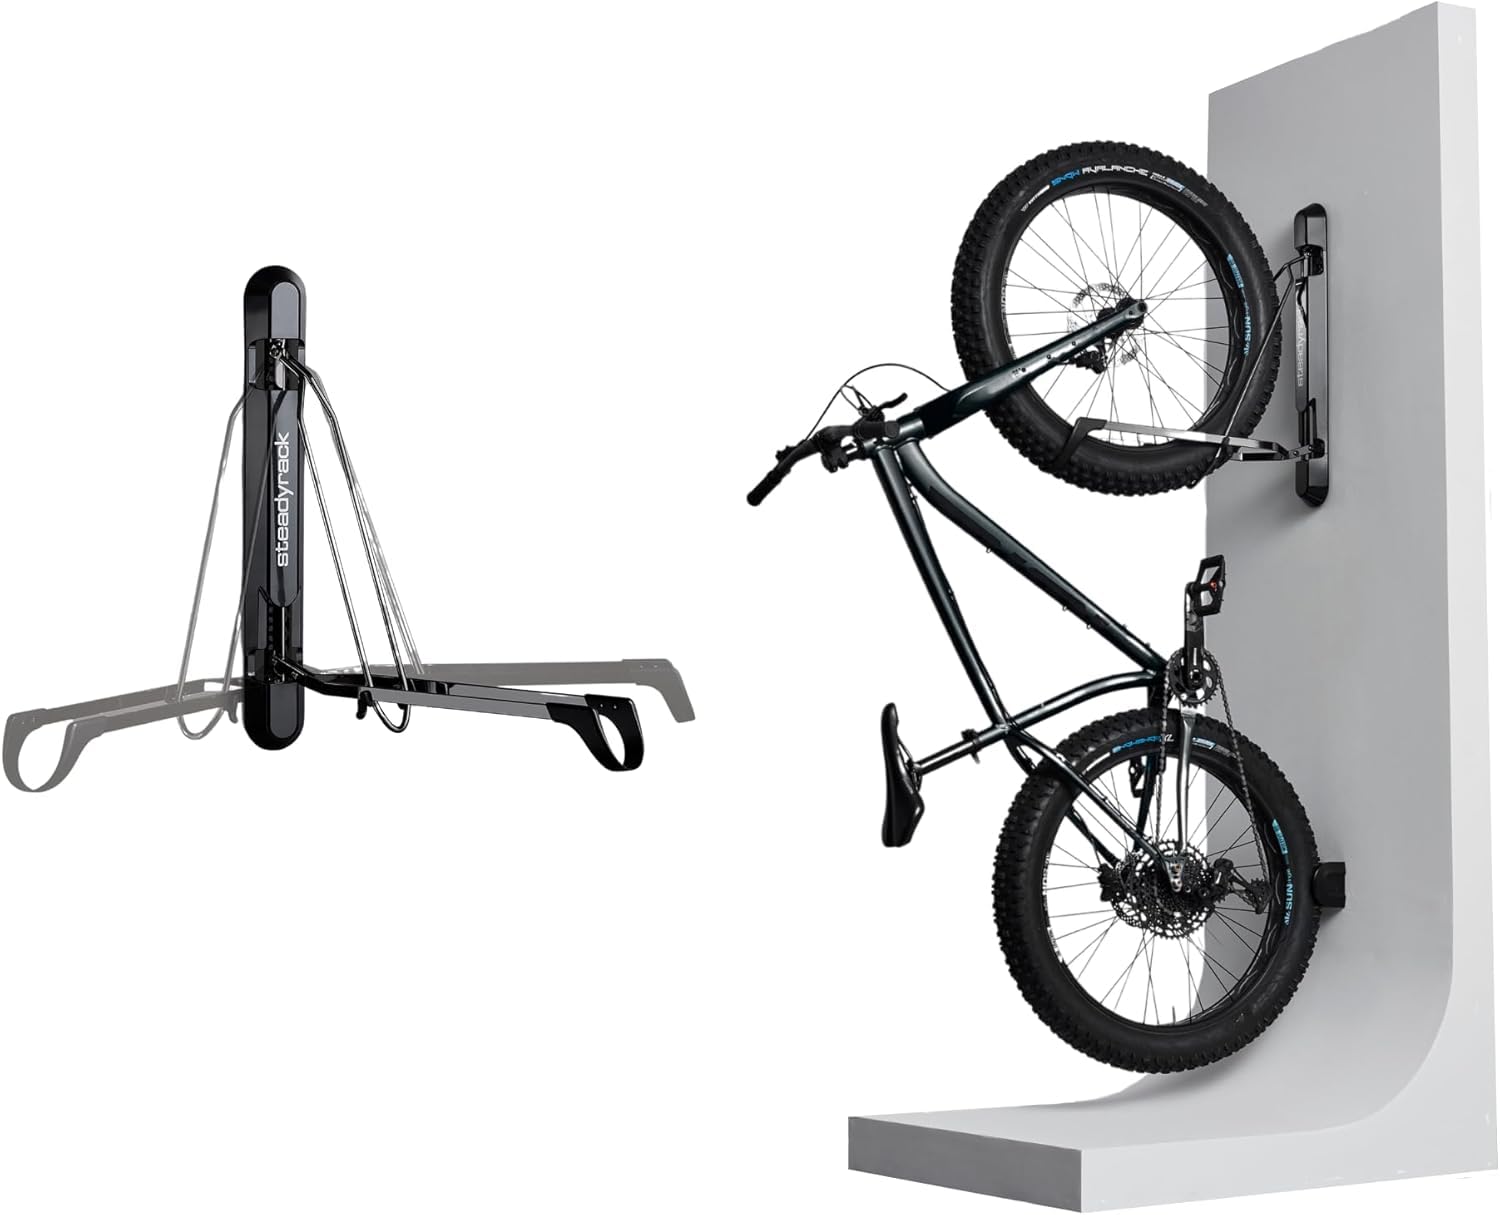
Steadyrack ProFlex Fat 1 Pack
- Stores fat bikes and plus-size tires securely
- Roll-in, roll-out design for easy storage without lifting
- Pivot system allows for space-saving storage against the wall
- Folds flat against the wall when not in use
- Made from heavy-duty chrome-plated steel to support up to 77 lbs.
- Specifically designed for bikes with tires 2.8"-5" wide and wheels 20"-29" in diameter
- Trusted brand with a history of quality since 2009
If bikes are always in the way, this ProFlex Fat rack makes multi bike wall storage feel effortless. You don’t have to lift a heavy e-bike — just roll the rear wheel into the cradle, let the arm support it, then swing the rack to the side to tuck the bike nearly flat.
It’s perfect for daily riders, families with mixed bike sizes, or when you need to free up space for a car, a weekend project or guests. Mount to studs or masonry for best results; once installed you’ll find it handles fat tires, fenders in many cases, and even heavier e-bikes with minimal fuss.
Ease Of Use
|
Feature |
Ease Level |
|---|---|
|
Installation (mounting to studs) |
Moderate |
|
Loading and removing bikes (roll-in) |
Easy |
|
Using the pivot to tuck bikes away |
Easy |
|
Accommodating bikes with fenders |
Moderate |
Durability
Built from heavy-duty, chrome-plated steel and rated to hold hefty bikes (reviewers report stable support for 70+ lb e-bikes). Designed for indoor use — not ideal for constant outdoor exposure — and backed by a standard warranty when registered.
Key Benefits
- Designed for fat tires (about 2.8″–5″) and wheels 20″–29″
- Roll-in, low-lift system makes loading heavy bikes straightforward
- Pivot arm swings bikes flat against the wall to reclaim floor space
- Heavy-duty/chrome-plated steel construction for reliable support
- Works great as part of a multi bike wall storage setup in garages or apartments
Rating: 4.5 (total: 713+)
Best Fender
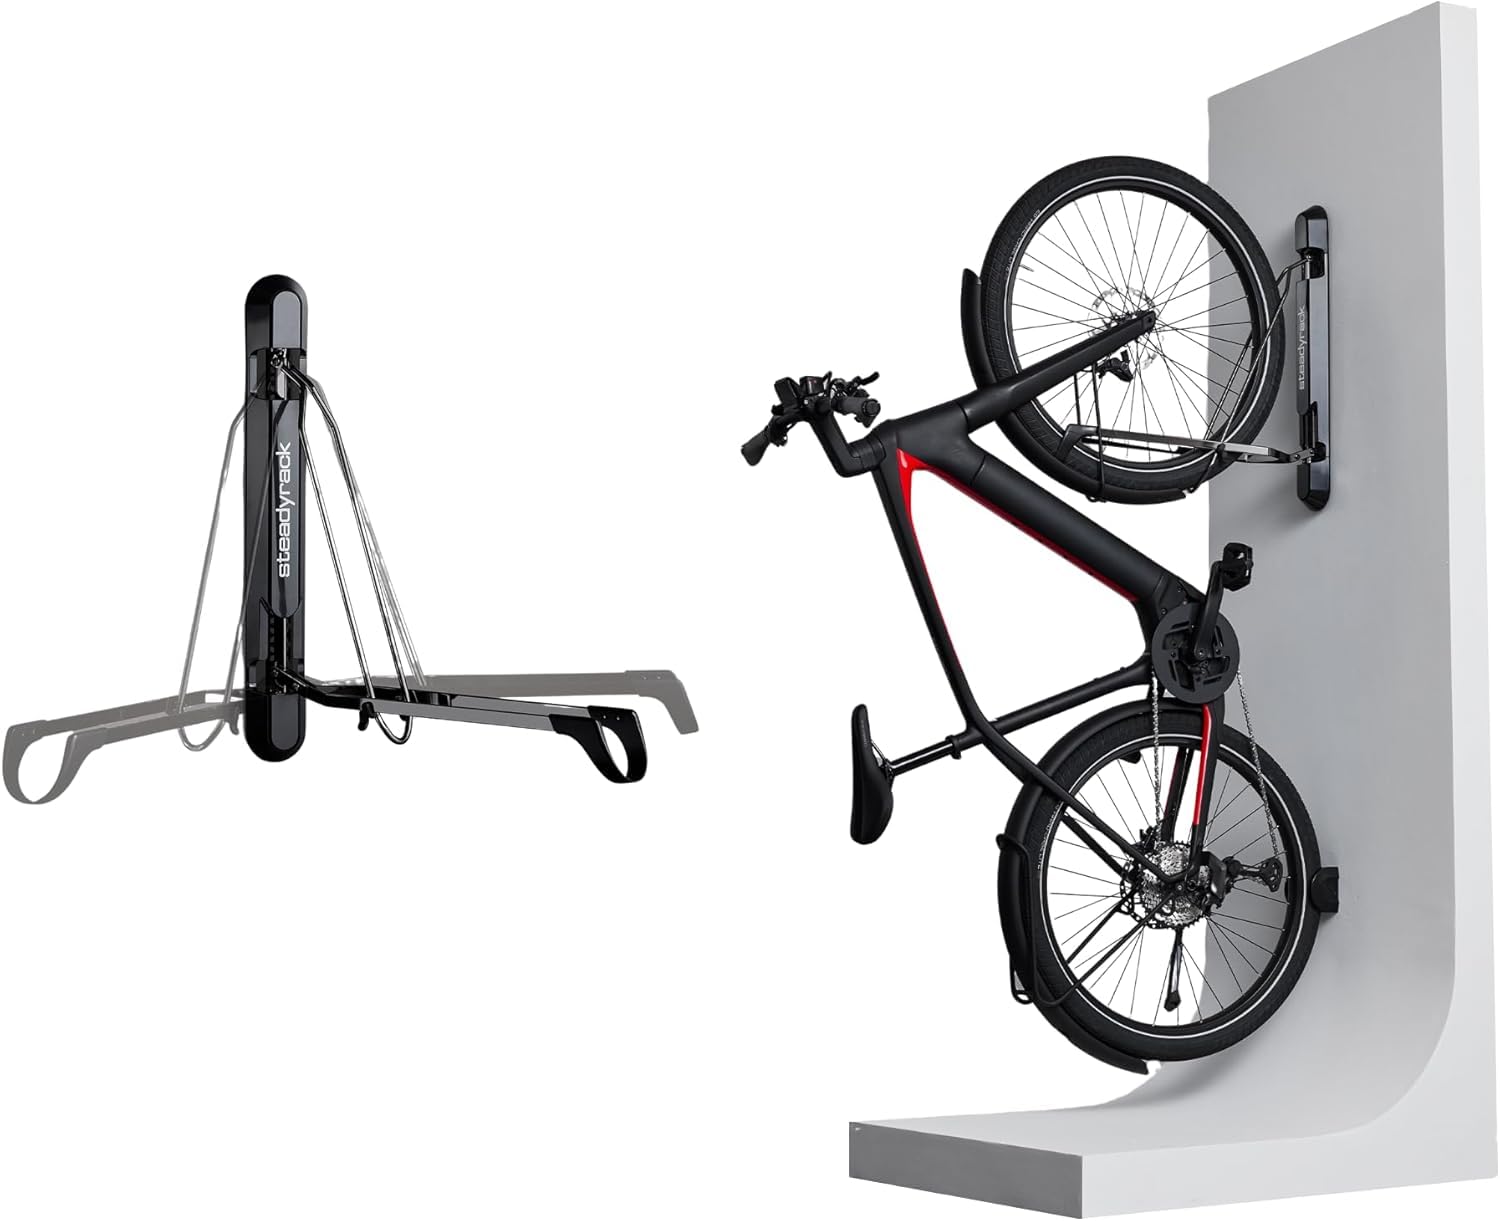
Steadyrack Fender Rack
- Compatible with bikes up to 77 lbs and tire widths up to 2.1 inches
- Easy to load with pivoting design for effortless bike storage
- Space-saving vertical design ideal for small apartments and garages
- Suitable for bikes with fenders or mudguards without requiring adjustments
- Built with durable materials for long-lasting performance
- Accommodates wheel diameters between 20 and 29 inches
- Backed by a quality guarantee for customer satisfaction
If your bikes keep crowding the floor, this Fender Rack makes multi bike wall storage surprisingly painless. You roll the rear wheel into the cradle, the arm supports the bike, and the swivel lets you tuck it tight to the wall so you reclaim floor space for a car, a workbench, or just less clutter.
It’s a great fit if you have cruisers or commuter bikes with fenders or mudguards, and many people report it handles heavier e-bikes too when mounted to studs or masonry. For everyday use — commuting, family storage, or clearing space for weekend projects and guests — it’s simple and reliable, and once it’s up you’ll notice a lot less tripping over handlebars.
Ease Of Use
|
Feature |
Ease Level |
|---|---|
|
Installation (mount to studs or masonry) |
Moderate |
|
Loading and removing bikes (roll-in) |
Easy |
|
Using the swivel to tuck bikes away |
Easy |
|
Adapting to bikes with fenders or different handlebar widths |
Moderate |
Durability
You’ll notice it feels solid — carbon steel frame with UV-treated polymer parts and nylon components. Reviewers say it lasts when mounted properly to studs or masonry; intended for indoor use and backed by a 1-year limited manufacturer warranty.
Key Benefits
- Easy-lift roll-in design works well with fenders and mudguards
- Pivot arm swings bikes nearly flat to free up floor space
- Built from carbon steel, ABS and nylon for dependable indoor use
- Fits 20–29″ wheels and tire widths up to 2.1″, so different bikes play nice together
- A practical option when you want neat, multi bike wall storage in garages or apartments
Rating: 4.7 (total: 901+)
Best Mountain Bike
Steadyrack ProFlex Wide
- Holds bikes up to 121 lbs with heavy-duty steel construction
- Roll-in, roll-out design for easy storage of heavy mountain bikes
- Accommodates mountain, eMTB, gravel, and fender-equipped bikes
- Pivot and fold design maximizes storage and keeps space clear
- No assembly required and easy installation with included kit
- 5-year warranty for durability and support
- Space-saving design for indoor garage, apartment, or home use
If your bikes are taking over the garage floor, this ProFlex Wide makes multi bike wall storage way less stressful. You roll the rear wheel into the cradle, pivot the arm and the rack swings the bike toward the wall — then it folds nearly flat when you don’t need it.
It’s built for mountain bikes, gravel rigs and many eMTBs (holds up to 121 lbs), so whether you’re stashing daily commuters, weekend trail bikes, or clearing space for a guest or car, it handles the job. Mount it to studs or masonry, give a little thought to spacing for multiple bikes, and you’ll quickly reclaim room and stop bumping handlebars every time you walk through the garage.
Ease Of Use
|
Feature |
Ease Level |
|---|---|
|
Installation (mount to studs or masonry) |
Moderate |
|
Loading and removing bikes (roll-in) |
Easy |
|
Using the swivel and folding to save space |
Easy |
|
Positioning multiple racks side-by-side |
Moderate |
Durability
You’ll feel the heft — heavy-duty steel frame designed for mountain and e-bikes, tested to hold up to 121 lbs. Reviewers report long-term reliability when mounted properly; backed by a 5-year warranty.
Key Benefits
- Roll-in, roll-out design makes loading heavy bikes simple
- Space-saving pivot and fold tucks bikes flush to the wall
- Built for wide tires and eMTBs — supports up to 121 lbs
- Durable steel construction with a 5-year warranty for peace of mind
- Great option for neat, multi bike wall storage in garages and apartments
Rating: 4.8 (total: 2286+)
FAQ
How Do I Choose The Right Multi Bike Wall Storage Rack?
You should start by matching the rack style to your bikes and space: choose a bar-style or hook system when you need to store several bikes side-by-side, and choose a pivot or fender-specific rack when you have wide tires or full fenders. Check tire width compatibility and whether the manufacturer offers fat or fender versions, and verify the stated weight capacity per hook or shelf against your heaviest bike.
Measure the height of your tallest bike and the floor-to-wall clearance you need so you can walk past the mounted bikes comfortably. Look at mounting requirements—some multi bike wall storage options require stud or masonry mounting and some vendors include lifetime or limited warranties and responsive customer support.
For installation flexibility and long-term durability consider powder-coated or rust-resistant finishes and whether you might want a ledger board or plywood backing to spread the load. Measure clearance and stud locations before you buy so you don’t end up with a rack that won’t fit or that’s difficult to use.
Will My Bikes Fit And Will The Rack Hold Their Weight?
You need to check two things: physical fit and secure mounting. For physical fit, confirm the hook or cradle width and whether the design accepts narrow road tires, wide mountain or fat tires, or fenders; some racks are sold in Classic, Wide or Fat versions for that reason.
For weight, read the manufacturer’s per-hook or per-shelf capacity and compare it to the actual weight of each bike—e‑bikes and cruisers can be much heavier than you expect. The rack’s listed capacity only matters if you mount it as instructed, usually into studs or masonry; using only drywall anchors is a common misconception and can fail. If your studs don’t line up where you want the rack, install a plywood ledger to distribute load across multiple studs. Keep in mind that a 5-bike or 6-bike rack can physically hold that many bikes but may be hard to access when fully loaded; alternating handlebar orientation or leaving extra spacing improves usability.
How Do I Install And Use Multi Bike Wall Storage Safely Without Damaging Bikes Or Walls?
Begin by locating studs with a reliable stud finder and mark the mounting height using the tallest bike’s top point; if you can’t hit studs in the desired location mount a continuous plywood backing secured to studs to give you solid anchor points. Use the recommended lag bolts or heavy-duty masonry anchors for concrete and avoid small plastic drywall anchors for primary fasteners.
Protect the wall where tires contact it by adding a small plywood strip or wall protector to prevent scuffs. When hanging bikes, place the wheel on the hook or cradle so nothing presses on spokes or brake rotors and, if the rack allows, alternate handlebar orientation to pack more bikes while keeping them removable.
After installation, test the rack with each bike close to the maximum expected load and periodically recheck mounting hardware for tightness. Always follow the manufacturer’s mounting instructions and get help for heavy e‑bikes during the first few hangs.
Wrapping Up
Choose the rack that matches your bikes and mounting surface. If you need to hang many bikes on a budget, long bar and hook systems like the StoreYourBoard 8-bike or 5-bike models free up a lot of floor space. If you want easier daily access and a safer load on frames and tires, Steadyrack’s pivoting racks are worth the premium.
For larger fleets or a modular setup, Koova’s 6-bike configuration is a strong middle ground. Measure tire widths and handlebar spacing, plan for stud or masonry mounting, and you’ll turn multi bike wall storage into usable, organized garage space that keeps bikes accessible and protected.
This Roundup is reader-supported. When you click through links we may earn a referral commission on qualifying purchases.


