First Step to a Great Garage: Prepping Your Floor The Right Way

A clean, smooth floor is the starting point for any awesome garage project, whether you’re working on a classic truck, building a new workbench, or just making space to breathe.
But before you can patch or coat your floor, you have to clean it. This is the most important step. It guarantees that any repair materials or sealants will bond correctly and give you a finish that lasts for years.
Getting your floor ready means using tough degreasers on old stains, scrubbing away grime, and sometimes using a grinder to smooth rough areas and open up cracks for repair.
We’ve sorted through all the options to find the best tools for the job. Based on professional advice and real-world reviews, here are the products you need to get a flawless, durable garage floor.
How to Defeat Stubborn Garage Floor Stains
When it comes to degreasers, Oil Eater is a true powerhouse. It cuts through caked-on grease and old oil stains on concrete, asphalt, and even dirty shop rags.
While some nasty stains might take a couple of tries, Oil Eater can handle almost anything you throw at it. Use it with confidence to lift oil, grease, and other sticky grime from your concrete.
For light spots, just let it soak for a minute, scrub with a push broom, and rinse. For deep-set stains, use it undiluted, scrub with a stiff brush, and give it at least 10 minutes to work before rinsing it away.
One of the best things about Oil Eater is its non-toxic, biodegradable formula. It’s water-based, so it’s much safer for your plumbing and is even safe for septic systems, which is something harsh chemical degreasers can’t claim.
Most stains lift on the first try, but the worst spots might need a second pass. Learn more on the Oil Eater Amazon page.
Pro Tools for a First-Class Repair Job
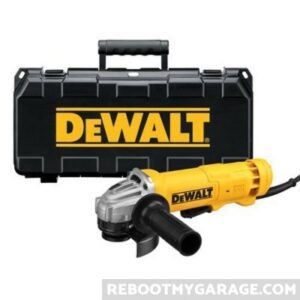
To properly fix a crack, you first need to widen it. An angle grinder helps you clear out loose material and create a clean, solid channel for the new patching compound to grab onto. This step is key for a strong, permanent bond.
For a tool with modern cordless freedom and serious power, the DeWalt FLEXVOLT ADVANTAGE grinder (model DCG416B) is our top pick. It lives up to DeWalt’s name for being tough, easy to use, and packed with safety features.
Be smart: angle grinders throw sparks and demand respect. Always wear safety glasses, hearing protection, and gloves.
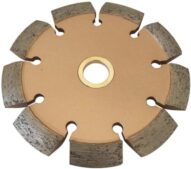
To prep cracks like a pro, you need a special attachment called a crack-chasing blade. The Alskar Diamond blade earns high marks for its performance and toughness. It’s designed for 4-inch grinders like the DeWalt one above.
Its V-shape cleans out cracks perfectly, creating the best possible surface for the filler. Users love it, saying it “cuts like a hot knife through butter” and is “very well made and durable.”
How to Safely Prep Your Floor for Paint or Sealant
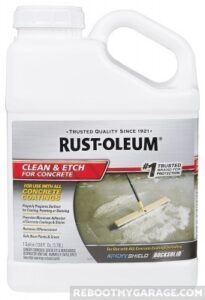
Etching is a must-do step if you want paint, stains, or sealants to stick to your floor. This process creates a slightly rough surface with tiny pores, similar to how sandpaper preps wood.
This texture, or “tooth,” gives coatings something to grip, ensuring they won’t peel up later. While this job used to require dangerous muriatic acid, modern products are much safer.
Rust-Oleum Clean & Etch works just like acid but without the nasty fumes or risk of chemical burns. Its acid-free formula is odorless and won’t harm plants, pets, or kids.
A single bottle treats up to 500 square feet of concrete. While you don’t need to neutralize it like acid, you do have to rinse the floor very well (three times is a good rule of thumb) to make sure no residue is left behind.
View Rust-Oleum Clean & Etch on Amazon.
How to Protect Your Concrete from the Inside Out

Instead of forming a film on top of the floor, a penetrating sealer soaks deep into the concrete’s pores. This creates a waterproof barrier from within, which is your secret weapon against long-term damage from salt and water.
Once applied, the concrete is much more resistant to pitting and flaking (spalling) caused by freeze-thaw cycles and road salts tracked in during winter.
The PS101 Siliconate Sealer from Concrete Sealer USA is a fantastic water-based option for this. It does an amazing job of repelling water, which also makes cleaning up future spills a lot faster.
Because it works below the surface and doesn’t form a film, the sealer lets the concrete “breathe.” This means you can still paint or apply another decorative coating over it later if you decide to change up the look.
View the PS101 Penetrating Sealer on Amazon.
Fixing Small Chips and Pits: The Best Polymer Patcher

For patching small areas of flaking, pitting, or low spots up to 1/2-inch deep, we recommend Sakrete Top ‘N Bond. This is a polymer-modified concrete patcher that contains sand, cement, and a special bonding agent.
On its own, new concrete won’t stick to old, cured concrete. The special polymer in this mix creates the powerful, lasting bond you need for a repair that holds up.
Just add water to the mix in a bucket—no tricky measuring of multiple parts required. Start with a little less water and mix until you get the consistency you want.
Pro tip: For an even stronger bond, lightly mist the repair area with a spray bottle of water before applying the patch. This simple step keeps the old, dry concrete from sucking the moisture out of the new patch too quickly.
You have about 20 minutes to work before it starts to set, so only mix what you can use in that time. It smooths on easily with a trowel and dries to a rock-hard finish. One 10 lb. pail covers about 4 sq. ft. at a 1/4-inch depth.
Buy Sakrete Top ‘N Bond on Amazon.
How to Give Your Whole Floor a Fresh Surface


Sakrete Flo-Coat Concrete Resurfacer application
If your floor has widespread surface damage, Sakrete Flo-Coat Concrete Resurfacer is the perfect solution. After you’ve prepped large areas of spalling, pitting, or uneven spots, use Flo-Coat to fill and level the whole area for a brand-new surface.
Unlike a thick patcher, Flo-Coat is a flowable mixture that you pour out and spread with a squeegee instead of a small trowel. This lets you cover big sections of your garage floor quickly and smoothly.
If you have cracks wider than 1/8 inch, first mix a small, thicker batch of Flo-Coat with less water. Trowel this into the deep cracks before you resurface the entire area with the standard, looser mix.
When mixed right, Flo-Coat flows into all the damaged spots, creating a smooth, durable, and renewed surface. It can fix damage up to 1/2-inch deep, and one 20 lb. bag covers about 36 sq. ft. at 1/16-inch thickness.
Buy Sakrete Flo-Coat on Amazon.
For the Toughest Cracks: The Ultimate 3-Part Epoxy Fix

For deep, wide cracks or large holes where you need serious strength, a three-part epoxy mortar is the best solution you can get. This is the industrial-grade choice for a repair that’s often stronger than the original concrete.
This type of epoxy can be up to 10 times stronger than regular cement. It fills cracks over 1 inch thick, creating a 100% waterproof and incredibly tough repair.
An epoxy mortar kit includes a resin, a hardener, and a special sand-like aggregate. When you mix them, they form a thick mortar that you apply with a trowel and that cures to a medium gray color.
A top-rated product like the Rock-Crete Epoxy Mortar Kit is what the pros trust for these heavy-duty repairs.
A note on structural cracks: This product will fill gaps with an incredibly hard, waterproof patch, but it won’t fix the underlying cause of a structural problem. If you think your foundation is shifting, please consult a professional and see our guide: How Do You Fix Garage Floor Cracks?
How to Repair Widespread Flaking and Damage
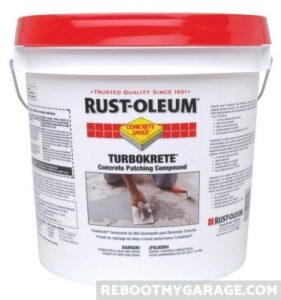
Rust-Oleum TurboKrete Concrete Patching Compound is our top pick for a 3-part epoxy made to fix large areas. It’s engineered to correct spalling (when the concrete surface flakes or peels away) and other widespread, shallow problems.
For more details on this specific issue, see my article How Do You Fix Garage Floor Spalling and Pitting?
This powerful compound dries to be three times stronger than concrete, and you can walk on it in just 4 hours. But that speed comes with a catch: you have to work fast.
The moment you mix all three parts, you only have about 20 minutes to spread it before it hardens. You must be completely ready to apply TurboKrete immediately after mixing.
Unlike other epoxies, you can’t easily mix TurboKrete by hand. Use a drill with a mortar mixer paddle for the best results. For a proper cure, only apply it when the temperature is between 45 and 90° F.
Buy TurboKrete on Amazon.
Easy Fixes for Smaller Cracks and Imperfections
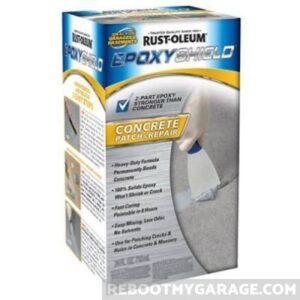
Rust-Oleum Patch & Repair is the best 2-part epoxy for concrete cracks up to 1/2 inch wide and small patches of pitting. This tried-and-true product dries in 8 hours and permanently bonds to the existing floor.
The kit has everything you need and is pre-measured, making it incredibly simple for DIYers. You just mix the two parts together on a piece of scrap cardboard and apply it with a putty knife.
It gives you a 30-minute working time before the mixture begins to harden, so you have plenty of time to get a smooth, level finish. The final repair dries to a medium gray color.
Best of all, the cured patch is three times harder than the concrete around it. You can paint over it after 24 hours, but it’s best to wait for warm weather to ensure a perfect cure.
Buy Patch & Repair on Amazon.
The Easiest Way to Fill Hairline Cracks

The RTG Concrete Crack Filler is a powerful epoxy that saves you from the messy job of mixing ingredients and rushing to apply it. The genius is in the tube’s design.
RTG mixes the resin and hardener for you in a special nozzle as you dispense it. Just load it into a standard caulking gun, and the two components combine perfectly as you squeeze the trigger.
The result is a perfectly blended epoxy that you apply directly into the crack. It’s clean, simple, and creates a strong, waterproof repair for cracks up to 1/2-inch wide.
This is the ideal choice if you want a no-mess, no-guesswork fix for cosmetic cracks before painting or sealing your floor. It works best in warmer weather (at least 55° F), and you can paint over the repair in just one day.
Buy RTG Crack Filler on Amazon.
Your Cheat Sheet for Garage Floor Repair
To get a repair that lasts, always start with great prep. Follow these key steps before adding any patch or coating.
How to Prepare Your Concrete for Repair:
- Remove all oil and grease with a strong degreaser.
- Widen cracks and remove loose bits with an angle grinder and crack-chasing blade.
- Clean all dust and debris from cracks with a wire brush and shop vacuum.
- Give the entire floor a “toothy” texture with a concrete etcher before sealing or painting.
Choosing the right patch is just as important as the prep work. Here’s how to pick the best product for your floor’s problem.
How to Choose the Right Repair Product:
- For Hairline to 1/2″ Cracks: Use a Self-Mixing Epoxy (RTG Filler) for the easiest, no-mess application.
- For Small Cracks, Holes, or Pitting (up to 1/2″): Use a 2-Part Epoxy Patch (Rust-Oleum Patch & Repair) for superior strength.
- For Minor Flaking & Smoothing Rough Spots: Use a Polymerized Patcher (Sakrete Top ‘N Bond).
- For Large Areas of Surface Damage: Use a Polymerized Resurfacer (Sakrete Flo-Coat) to spread with a squeegee.
- For Deep, Wide Cracks & Holes: Use a 3-Part Epoxy Mortar (like Rock-Crete) for the strongest possible repair.
- For Widespread, Severe Damage: Use a heavy-duty 3-Part Epoxy (TurboKrete) when you need maximum durability and chemical resistance.


