What Are Spalling and Pitting, and How Can You Fix Them?

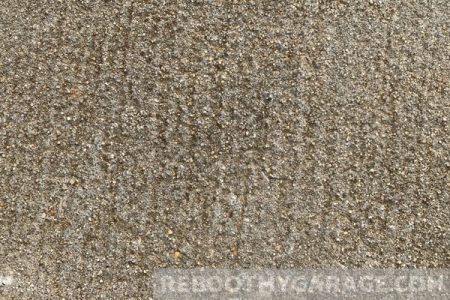
Is your garage floor looking a little rough? Spalling happens when thin top layers of concrete separate and flake off from the main slab. You’ll see them come off in small sheets or flat chunks, creating an ugly, uneven surface. Pitting is similar, but it looks like a bunch of small, random holes in the concrete.
So, how do you fix concrete garage floor spalling and pitting before they get any worse?
To fix spalling and pitting, you’ll first remove any weak concrete around the damage. Next, thoroughly clean and prepare the surface for the repair. Finally, you will patch the area with an epoxy-based product.
This simple process creates a strong, seamless, and lasting repair that blends in with your existing floor. However, it’s important to know that this approach is for surface-level problems. If you think there might be a serious moisture or structural issue, you must call a professional repair company to address the real cause.
Why Is My Garage Floor Flaking and Chipping?

Spalling is basically the surface of your concrete peeling away in layers. This happens over time as moisture gets into the concrete’s pores. When winter comes, that water freezes and expands. In the spring, it thaws and contracts. This endless cycle weakens the concrete.
As the concrete coating experts at Guardian Garage Floors explain, extreme temperatures and the de-icing salts you track in from your car also contribute to the damage. This microscopic damage causes tiny fractures, which eventually break into dust and flakes on the surface.
Sometimes spalling points to deeper issues, like a problem with the moisture barrier under your slab. If you suspect the issue is more than just surface wear, you must investigate further before starting a repair.
Pitting, which looks like many small, random holes in the concrete, has several causes. According to Level Best Concrete Leveling, pitting can be caused by temperature changes, frost, certain concrete additives, or even simple mistakes made when the slab was first poured.
Pitting isn’t usually a sign of a deeper moisture issue. But if a moisture problem does exist, any patch you apply will eventually fail.
How to Spot Water Problems Before You Start a Repair

Hold on! Before you start fixing any spalling or pitting, you have to check for hidden water issues that might need a pro. There’s no point in spending your time and money on a fix that will just come back next year.
One tell-tale sign is a chalky white stain called “efflorescence.” This happens when water and salt seep up through the floor slab. As the water evaporates, it leaves the salt (calcium chloride) behind on the surface.
While the stains themselves aren’t a big problem and can be cleaned, they are often a clear sign of a moisture issue, as Lynx Concrete Coatings points out.
Other signs include a constantly damp spot on your garage floor or visible water spots that show up after a heavy rain. You can also use a moisture meter to check for hidden leaky pipes in your walls or floor.
These are all clues that an ongoing water problem is affecting your garage floor. No patch can withstand a constant supply of water, so you’ll need to solve that problem before repairing the floor.
Why You Must Test for Moisture Before Any Repair

WARNING! It is absolutely essential that you solve any moisture problems before you apply any kind of epoxy or coating. If you skip this step, your repair work is doomed to fail.
As explained by All Garage Floors, water naturally moves up through porous concrete. If a floor coating doesn’t breathe, water vapor gets trapped underneath and can’t evaporate.
This trapped moisture creates immense pressure inside the concrete. Eventually, that pressure will cause new spalling and pitting, ruining all your hard work.
In extreme cases, especially under a heavy-duty epoxy coating, the pressure can build so much that chunks of your floor pop out. Instead of letting moisture escape, heavy sealers trap it and cause pressure to build. You must test for moisture before you apply any patch or coating.
The Simple DIY Moisture Test: The Plastic Sheet Method

If you think you have a moisture problem, you can perform a simple and effective test yourself. This popular DIY method is sometimes called by its technical name, ASTM D4263.
First, grab a 16-by-16-inch piece of plastic wrap. Place it flat on the garage floor in the area where you suspect moisture. Use duct tape or Gorilla tape to completely seal all four edges, creating an airtight barrier.
Leave the plastic sheet in place for at least 24 hours. This gives any moisture vapor enough time to be drawn out of the concrete.
After a day, peel back the tape and check the area. If the concrete is dark and damp, or if you see visible condensation on the underside of the plastic, you likely have a moisture problem that needs professional attention.
If the area under the plastic is completely dry, you can move forward with your spalling or pitting repairs.
For a More Precise Result: The Calcium Chloride Moisture Test
If the plastic sheet test showed moisture, you’ll want to get a more accurate measurement. You can do this with a calcium chloride moisture kit, which gives you a reading of the moisture vapor emission rate.
This test follows the industry standard ASTM F1869, so it provides reliable data. As detailed by sources like Bob Vila, using a kit involves a few simple steps.
First, you must grind a small patch of the concrete surface according to the kit’s instructions. This ensures you’re testing the concrete itself, not an old sealer.
Next, place the pre-weighed dish of calcium chloride on the prepared area and cover it with the plastic dome provided. Seal the dome to the floor with the adhesive strip from the kit.
You will need to wait 60-72 hours, as specified by the manufacturer, to let the calcium chloride absorb moisture from the slab. After the time is up, weigh the dish on the scale that comes with the kit.
Finally, use the chart on the box to find the moisture vapor emission rate. If the rate is too high, the kit’s instructions will guide you on your next steps, which usually means calling a professional.
What Should I Know Before Using an Epoxy Patch?

Epoxy patches blend right into the concrete, so they aren’t very noticeable once they’re cured. But here’s the catch: epoxy can be tricky to work with. The clock starts ticking the moment you mix it, and it can become unusable in as little as 15 minutes.
All epoxy products come as separate ingredients that you mix. A two-part epoxy has a resin and a hardener. A three-part epoxy adds an aggregate like sand to the mix.
You have to measure the parts carefully to get the right strength and bond. Plus, you must use the mixture quickly because of its limited “pot life.” It will harden before you know it, forcing you to throw away the batch and start over.
As the experts at The Concrete Network advise, plan ahead and only mix what you need for the immediate task. It’s always better to mix smaller batches more often than to throw away an expensive product that hardened too fast.
What Are the Benefits of an Epoxy Patch?

According to sources like Sunflower Epoxy, there are some great benefits to using epoxy for your repairs. The biggest plus? Epoxy-based materials are incredibly durable. They create long-lasting patches that can handle heavy traffic for years to come.
Epoxy also has excellent bonding power. It sticks exceptionally well to the existing concrete, creating a solid patch that won’t easily chip or break away.
Furthermore, epoxy is highly resistant to chemicals. This includes oil, gasoline, and other fluids common in garages, which would otherwise stain or eat away at a bare concrete patch.
From a style standpoint, epoxy can be pigmented with various colors. This lets you match your existing floor for a clean, uniform look.
Finally, epoxy-patched areas are attractive and easy to clean, helping you keep your garage looking sharp.
Are There Any Downsides to Using Epoxy?

Despite its strengths, you should consider a few drawbacks before choosing epoxy. Epoxy-based materials are usually more expensive than other concrete patching options, which can be a factor if you have a large area to repair.
Epoxy also requires a multi-step process for proper installation, including surface prep, mixing, and curing time. This can be more time-consuming than simpler fillers, but keep in mind that any quality concrete repair solution will require proper preparation and effort.
Timing your repair is also critical, as epoxy is temperature-sensitive. You should wait for weather between 45 and 90 degrees Fahrenheit before patching, as extreme cold or heat will affect how it cures and adheres.
Lastly, standard epoxy is sensitive to ultraviolet (UV) light, which can cause it to turn yellow over time with direct sun exposure. This is a concern if your garage door is often open or the repair area is near a window.
Step 1: Prepare Your Floor for a Lasting Repair

Whether you’re fixing spalling or pitting, every good repair starts with proper surface preparation. For spalling, you need to find damage that might be hiding just below the surface.
For this step, you’ll need a hammer and a pair of safety goggles. After putting on your safety glasses, use your hammer to gently tap the floor around the visibly damaged area. Listen for a hollow sound—this is your clue that the concrete is weak and damaged just below the surface.
Hit these hollow-sounding spots hard enough to break them loose. You want to expose all the weak concrete so you can fix the entire problem area at once.
Once all the weak concrete is gone, thoroughly clean the repair area. Use a wire brush to aggressively scrub inside the patch area, which will loosen any remaining weak material or debris.
For an even stronger bond, use a hammer and chisel or an angle grinder to create clean, vertical edges around the damaged spot. This gives the patch a solid “shoulder” to bond with instead of a flimsy, feathered edge.
Finally, sweep and vacuum the area meticulously. Get rid of every last bit of loose material and dust. Proper prep work is the secret to a durable repair, so don’t cut corners on this step!
How to Patch Small Areas of Spalling and Pitting
For smaller spots of damage, a simple two-part epoxy putty is a great solution. You will need safety goggles, rubber gloves, an epoxy patch kit like Rust-Oleum Concrete Patch and Repair (view on Amazon.com), a piece of cardboard for mixing, and a putty knife or small trowel.
First, get everything ready to go, because you need to work fast! You’ll have 30 minutes at most before the epoxy starts to harden. Put on your gloves and goggles before you start mixing.
Squeeze out equal parts of the hardener and resin onto your cardboard. Vigorously mix the two parts with your trowel until they are one uniform color.
Next, trowel the mixed epoxy onto the damaged area. Press it firmly into all the pits and cracks to ensure a strong bond and force out any trapped air.
Level the epoxy patch so it sits flush with the surrounding floor to create a smooth transition. If the damage is deep, you can apply a second coat after waiting 2 hours for the first to set.
Allow the patch to cure for 8 hours before allowing light foot traffic. You should wait a full day before parking a car or placing heavy items on the repair.
For an even smoother finish, you can sand the cured epoxy with 60-grit, 120-grit, and finally 200-grit sandpaper.
How to Tackle Large-Scale Spalling and Pitting Repairs
For larger or deeper areas of damage, a tougher three-part epoxy mortar is your best bet. This method provides superior strength for major repairs. A great option for this is Rust-Oleum TurboKrete (view on Amazon.com).
For this job, you will need safety goggles, rubber gloves, a heavy-duty 1/2-inch drill with a mortar mixing paddle, a paintbrush, a steel finishing trowel, and a cleaning solvent like Xylene.
First, check the weather! You’ll need a day where the temperature is between 45-90°F. Be ready to work fast, since an epoxy mortar mix gives you less than 30 minutes to work with. Put on your gloves and goggles.
In the mixing bucket, combine the part A base epoxy resin with the part B activator. Mix them for one minute using the drill and mixer attachment.
If the repair area is less than 1/2 inch deep, use a paintbrush to apply this A+B mixture as a primer to the repair area. Then, add the Part C aggregate to the bucket at a steady rate and continue mixing with the drill until it’s uniform.
Next, apply the mixture to the patch using the steel trowel, pressing it down firmly to ensure a solid, compact fill. Spread and flatten the material so it is level with the surrounding floor. To keep the epoxy from sticking to your trowel, you can apply a little thinner to the blade as you work.
Using the trowel, feather the material to a thin layer at the edges of the repair. This creates a seamless, professional-looking transition. Let the patch dry for 4 hours before walking on it and 24 hours before parking on it.
Finally, make sure to clean all your tools immediately with Xylene or another recommended thinner before the epoxy has a chance to harden.


